
All For Him/Her Crochet Crochet for Her or Him
November 11th, 2020
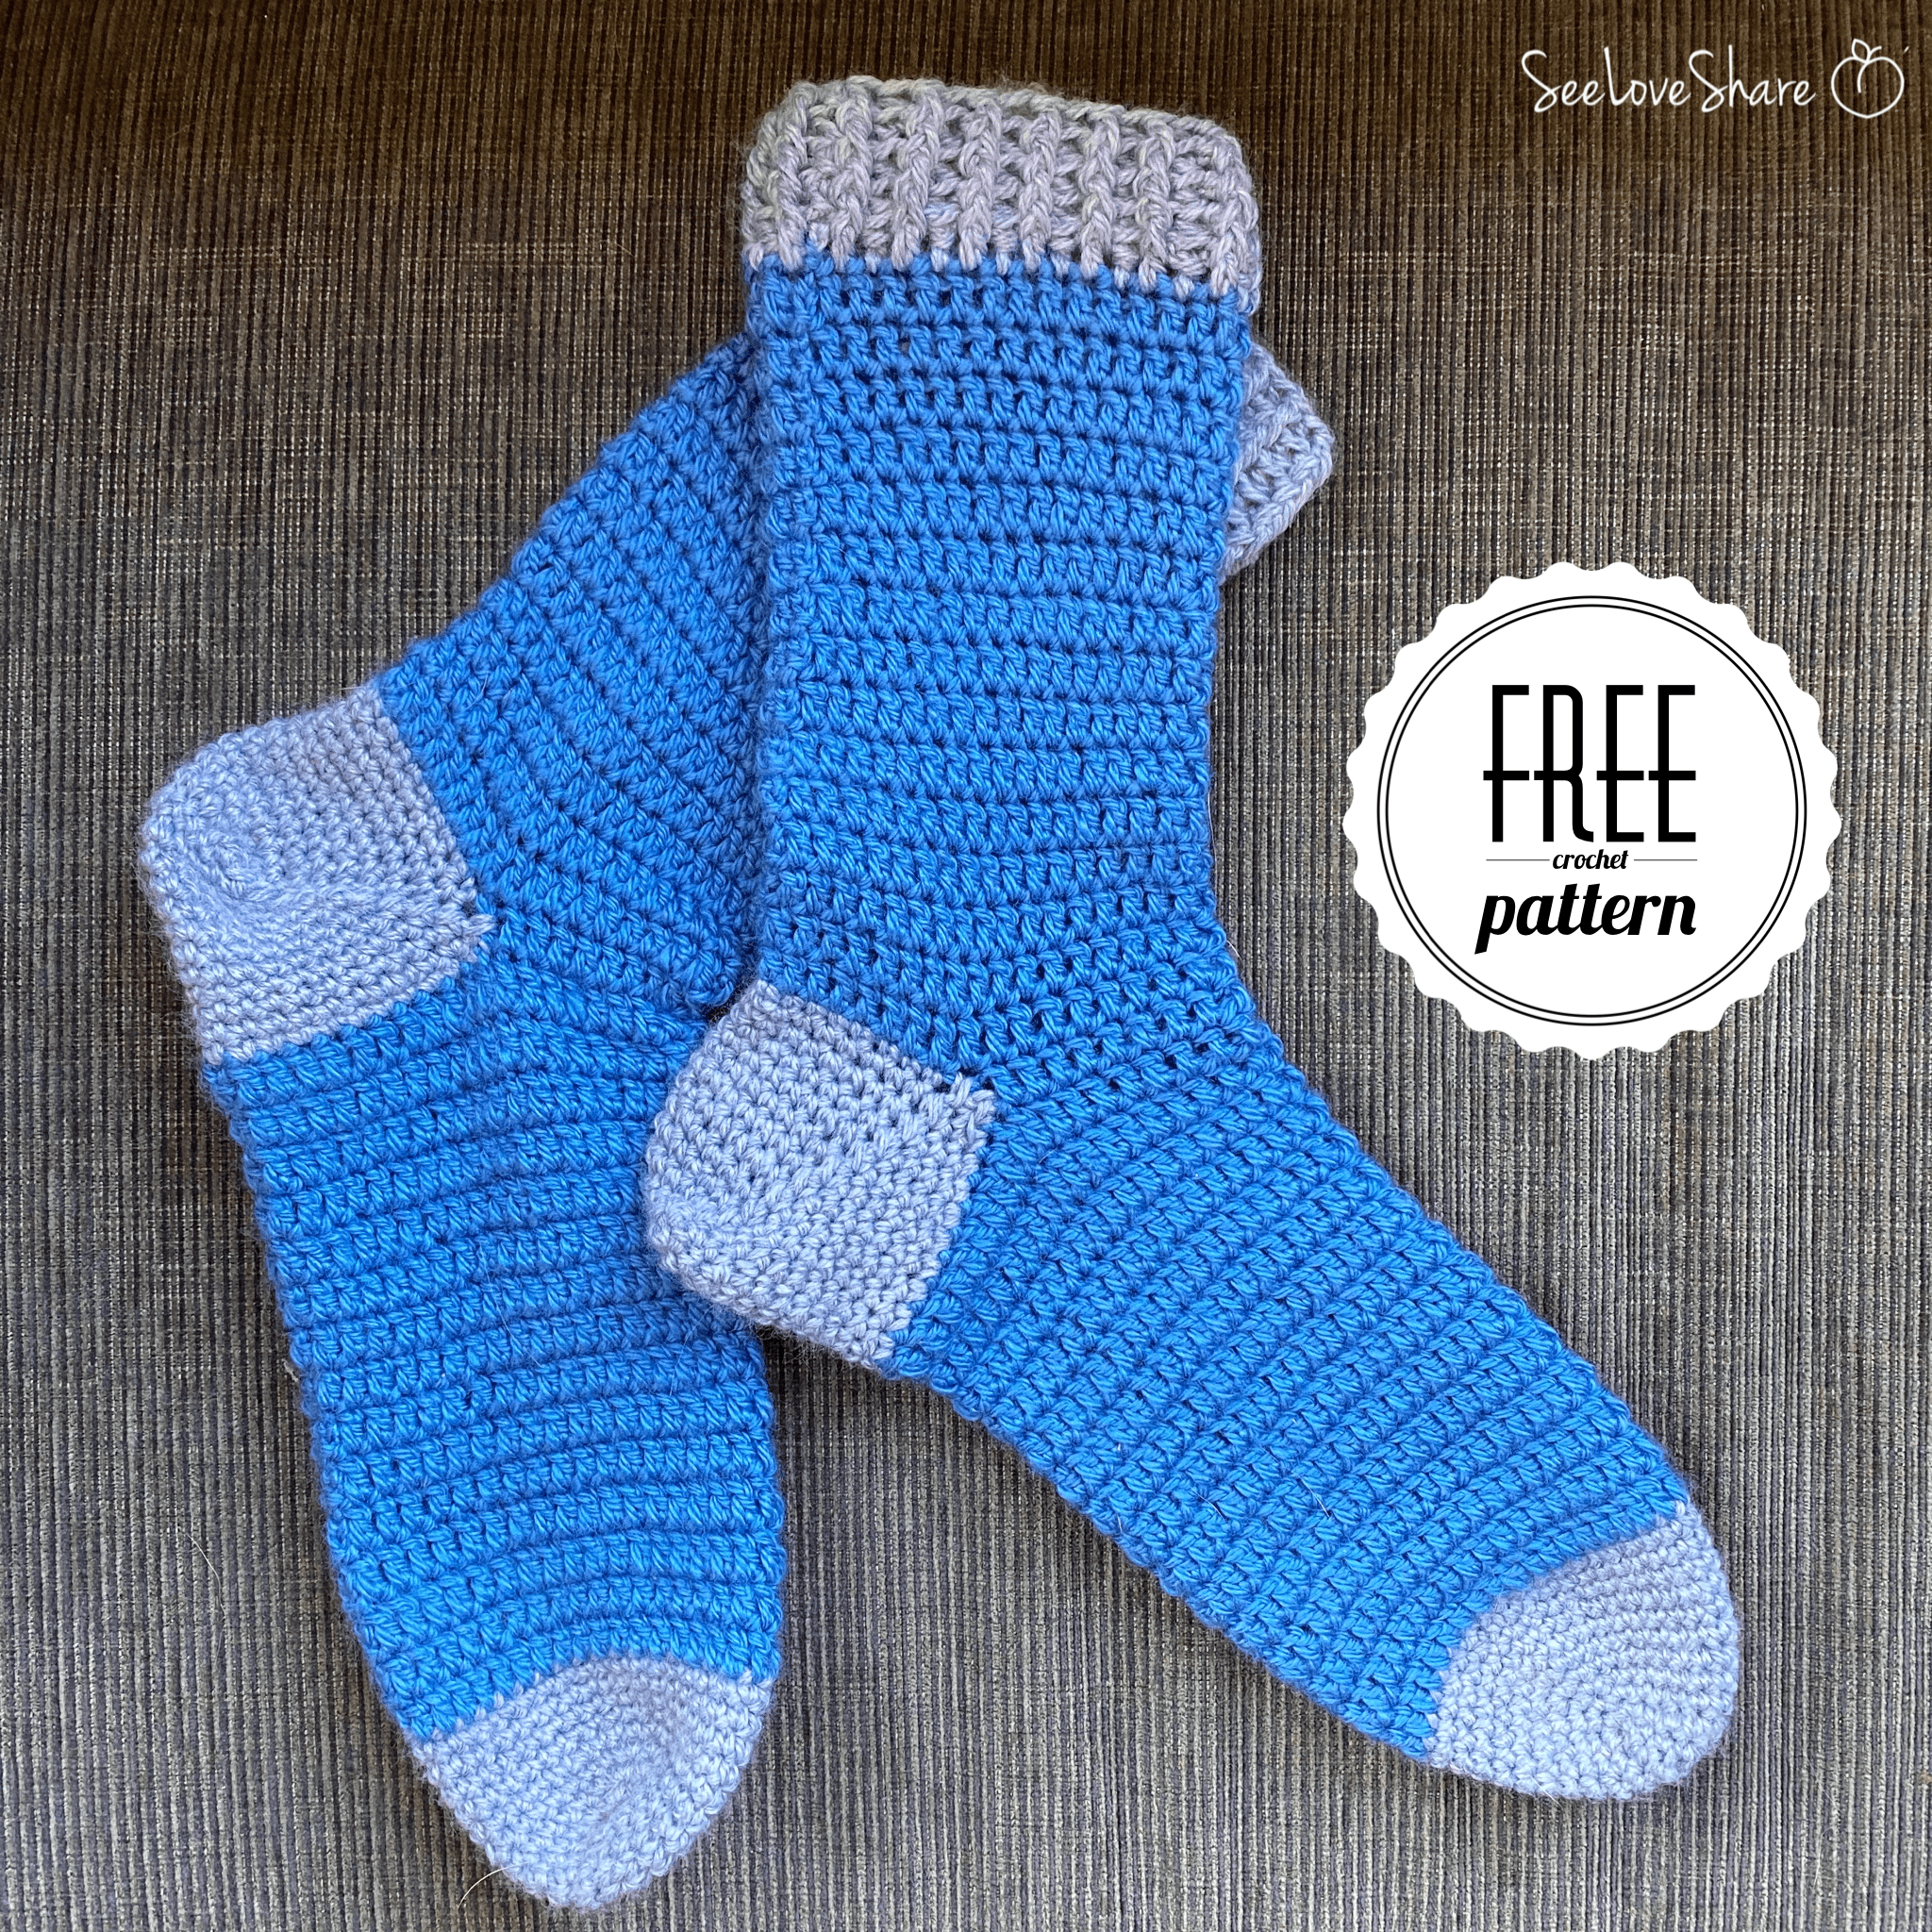
Cabin Socks – Free Crochet Pattern
We ended up extending our trip the the cabin. After finishing up my Softee Striped Socks (pattern here) SOMEONE was feeling left out so I decided to make him a set that works up even faster. These are very similar to the striped socks but I eliminated any colour changes and brought in double crochets. Both of those adjustments make this a pattern that will work up in no time. Here is how they’re made…

Pattern Notes:
This pattern is worked from the toe up to the cuff. Take the time to make sure you get the snugness right in the toe – it really makes a huge impact on how the rest of the body of the sock will fit up against your foot. I struggled here when I was developing this pattern which caused me to frog no less than 4 pair before I was happy with it.
You can adjust the width of the sock in increments of 2 sts.
Materials:
1 ball Bernat Softee Baby in Flannel

1 ball Bermat Softee Baby in Blue Jeans

4.5mm (UK 8 – US G6) crochet hook
[Begin testing the snugness of the toe on the tip of your toes, you want it to barely reach all 5 toes. It will seem like it will fit too tight but TRUST ME, this pattern will loosen as you work it up. If this starts to fit for you, move on to Rnd 7]
Rnd 5: (2 sc in next st, sc in next 13 sts, 2 sc in next 2 sc, sc in next 13 sts, 2 sc in next st (34)
Rnd 6: (2 sc in next st, sc in next 15 sts, 2 sc in next 2 sc, sc in next 15 sts, 2 sc in next st (38)
Rnd 7-9: Sc in ea sc around (38)
Rnd 10: sc in next 10 sts, change to white (this partial round will allow us to hide the seam created when we swap colours to be under the foot.
Foot:
Change colour and begin working the length of the foot.
Rnd 11: ch3, dc in every sts around, join with a slst to the top of your ch3. Do not turn,
Repeat row 11 length of the foot portion reaches a 1/4in before your heel. Bind off.
Begin working heel space for heel:
If you adjusted the toe size, take note of the st adjustments in [] below.
Rnd 1: sk 10 sts [or 1/4 of your remaining sts if you adjusted toe size], dc in next 18 sts [or 1/2 of your remaining sts if you adjusted toe size], ch18 [or 1/2 of your remaining sts if you adjusted toe size], join with a slst to the top of the 1st dc. You are now on the side of the foot.


At the end of last round, finish off keeping a long tail to sew heel shut. Sew heel shut.
Enjoy!

Want to make those striped socks? Here’s the pattern…
